
SeeStar Review
|
|
Time to read 3 min
|
|
Time to read 3 min
When ZWO first announced the SeeStar I was curious but wasn’t expecting much. I had tested other all-in-one “robotic” telescopes in the past and always felt they were sort of gimmicky. I got my first glimpse of the SeeStar back in April this year at NEAF and while it looked intriguing and piqued my curiosity a little, I wasn't completely sold on the idea. I liked the look of the interface however, and the price tag was much more attractive than some of the other units on the market at the time.
Fast Forward to late August and ZWO sent us our first one. With all the smoke we had it was several weeks before I was able to put the little scope to work, and I truly do mean little… one could easily fit it into a backpack if wanted. It comes with a nice hard foam case as well though, measuring 30cm x 30cm x 15cm, and comes with a clip-on white light solar filter.
The entire scope feels well built and the built-in battery makes it a breeze to transport wherever you desire. The usb-c charging port also gives you the ability to connect a portable power source while the scope is running to extend your night(s).
I finally got some clear skies so I thought what better way to check the ease of usability than to allow my 12-year-old daughter to use the scope. After installing the app on her phone and connecting for the first time the scope was updated and the language settings changed… oh, did I mention it talks! It does, but it’s not loud enough to bother anyone else that may be out enjoying the night too.
The interface was nice and clean, something that I’ve come to expect from ZWO though with their long running ASIAIR interface. We set the scope up in the backyard (bortle 8) on a little table and I then let her have free reign with it after showing her quickly how to use the app.
The SeeStar retrieved gps coordinates and then proceeded to move to whichever target she selected. Her first couple of targets were too low and blocked by neighbouring houses but eventually she picked some objects that were higher up.
The SeeStar seamlessly slewed to her object, plate-solved, and recentered but the stars were soft and out of focus. This was easily solved by pushing the autofocus button and after a minute or two the stars came to a very good focus. She was now ready to start imaging and with the press of a red “button” on the app it started.
A series of 10 second exposures are taken and SeeStar live “stacks” them. To say she was excited as her first object started to appear as watched her phone was an understatement. I’ll be honest, that alone would have made the SeeStar worth the price for me, but as the seconds turned into minutes I was quite pleasantly surprised with the quality of the images. There is a built-in filter wheel with a dual narrowband filter, and if you select a target that benefits from this the filter will automatically move into place (though you can change to unfiltered if you want with a simple slider). Her first target was the eastern veil nebula and the automated filter change worked fantastically.

It turned out to be a great night, and my daughter loved the SeeStar… so much so that she has expressed to me that she would now like a bigger telescope! 😊
The SeeStar was more than I expected, pleasantly so, which was great. At one point in the night the humidity shot up and as an added benefit there happens to be a built-in dew heater… they really did think of everything.
During image acquisition you can save the current state of the picture at any time to your phone and once you finish the image you get a final saved image both to your phone (in jpg format) and a raw image saved to the SeeStar. You also have the ability to save each sub frame to the SeeStar during acquisition if you feel like stacking yourself afterwards, but overall, I found the live stacking to do a pretty good job… though I did run into an issue one night were I had movement in one frame that messed up the final raw image.
I’m a little bit of an imager myself and was curious to play with the raw data afterwards in post processing to see what was attainable. Once again, I was pleasantly surprised.
Here are a few images from the live view of the SeeStar and then the post processed images. All taken from within bortle 8 skies.
Live view:


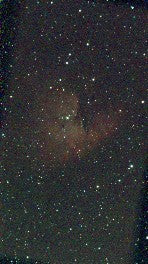
Post processing:

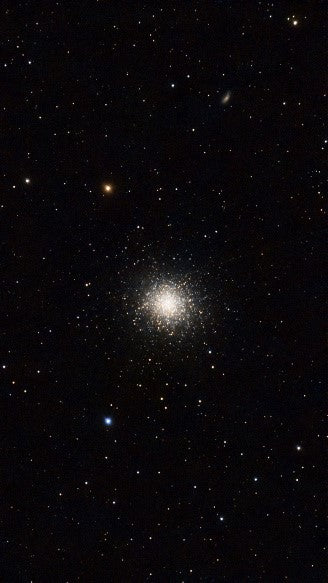


A final shot taken from a bortle 4 sky.
Liveview followed by post processing.


For the price, ease of use, and just plain fun I have nothing but good to say about the SeeStar. Is this going to replace a $1500 imaging setup? Definitely not, but anyone thinking about getting into imaging or electronically assisted viewing, this a fantastic place to start!

